Caravan, Motorhome & Campervan Water Damage Repairs
Water can enter a caravan, motorhome or campervan from outside the body or from plumbing and fittings inside the vehicle. By the time staining, swelling or a soft floor becomes visible, moisture may already have spread behind wall linings, cabinetry or floor coverings.
RnR Refinish provides water ingress assessment and repair services from our purpose-built facility in Clontarf, Brisbane. We work on caravans, motorhomes, campervans and other recreational vehicles with suspected leaks, moisture damage, failed seals, damaged floors and affected interior structures.
Water ingress can result from failed body seams, worn sealants, damaged windows, roof fittings, accident damage or poor manufacturing. It can also begin inside the vehicle through a leaking shower, cracked shower tray, water fitting, waste pipe, appliance connection or internal plumbing fault.
Our process starts by locating the likely source and identifying how far the moisture has travelled. We can then recommend a repair based on the vehicle’s construction and the extent of the damage, rather than simply applying new sealant over the visible area.
Water Ingress Is Not Always Caused by Rain
Roof leaks and storm damage are common causes of water ingress, but they are not the only places moisture can come from.
External water can enter through deteriorated roof seals, windows, doors, vents, skylights, body joins, awning mounts and other fittings that pass through the exterior skin. Movement while travelling can gradually place stress on sealants and joins, especially where different materials meet.
Internal water leaks can be just as damaging.
A loose plumbing fitting, leaking shower mixer, failed waste connection or hairline crack in a shower tray may allow water to move behind the bathroom lining or directly into the floor. Because these areas are enclosed, the leak may remain hidden while moisture spreads through timber framing, foam cores, composite panels or cabinetry.
Caravans and motorhomes flex and vibrate while being driven or towed. This ongoing movement can place stress on shower trays, plumbing connections and sealants that would normally remain stationary in a house. Water may then wick into nearby materials rather than pooling somewhere easy to see.
Common sources of water ingress include:
- roof, window and door seals, skylights, vents and air-conditioner mounts
- failed body seams and exterior joins
- awning brackets and solar-panel mounts
- accident or impact damage
- cracked shower trays and failed shower sealants
- leaking taps, mixers, water fittings, loose waste and drainage connections
- hot-water systems and appliance plumbing
- tanks, pumps and internal water lines
- manufacturing or component faults
Finding the original source is important. Replacing a stained panel or repairing a soft floor without stopping the leak can allow the same damage to develop again.
Performance Indicators
Industry-leading expertise, operational
and workplace metrics
Great repairs are built on more than experience, they’re backed by consistent results. We continually monitor our repair performance to improve customer communication, reduce repair times and deliver a better overall experience.


Non-Invasive Leak Detection Scanning
Visible signs do not always show where the leak started or how far the moisture has travelled.
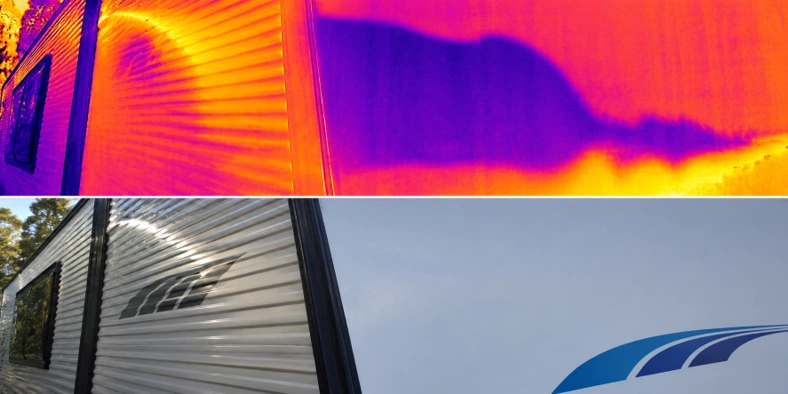
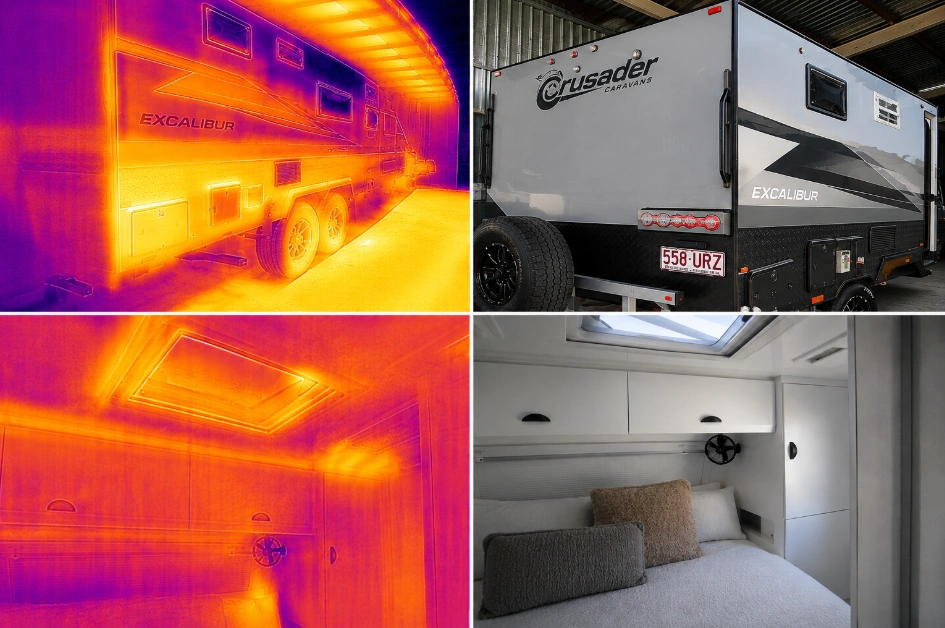
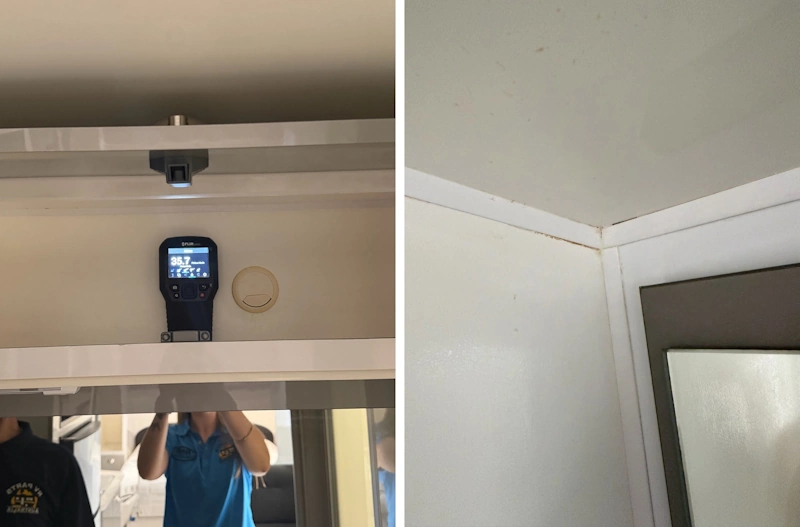
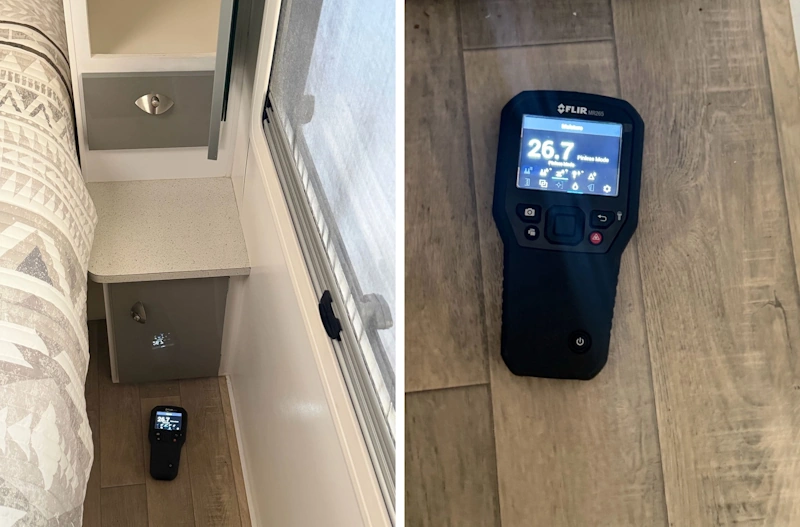
RnR Refinish uses non-invasive thermal moisture scanning to help identify temperature differences associated with moisture behind panels, walls and flooring. The scan can assist our team in locating affected areas without initially drilling holes or removing large sections of the interior.
Thermal imaging is particularly useful when investigating:
- water behind shower walls
- moisture beneath bathroom flooring
- affected composite floor sections
- leaks around windows and roof fittings
- moisture within wall or ceiling cavities
- the spread of water beyond the visible stain
- areas that require closer physical inspection
The scan provides evidence to support the next stage of diagnosis. It does not replace all physical inspection, particularly where damaged materials need to be exposed, but it allows the work to begin with better information.
Where suitable, RnR Refinish can complete a scan before the repair to record the affected area and another after the work to help verify that the area has dried and the identified leak has been addressed. RnR’s published diagnostic process uses thermal images and moisture data to guide targeted repairs and post-repair verification.
Why RnR Refinish Provides Leak Detection Tests Using Thermal Scanning, Moisture Readings & Water testing And Avoids Positive Pressure Leak Detection Methods
To understand why we avoid positive pressure testing, you need to understand how a caravan is built. Your RV is a complex assembly of fibreglass, aluminium, and composite panels, all held together and made watertight by high-grade sealants and urethanes.
These seals are designed with one specific job in mind: to keep water from the outside, out.
Think about your kitchen sink at home. If you put the bung in and fill that sink with water, it stays sealed. The weight of the water and the design of the plug work together to create a perfect seal. Now, imagine flipping that sink upside down. If you apply even the slightest pressure to that bung from the inside, it will leak immediately.
This is exactly what happens during a pressure test. Caravan seals and hardware are not designed to be subjected to heavy pressure from the inside out. When a repairer forces air into the cabin, they are putting stress on the sealant in the opposite direction of its intended design. We have experienced completing reseals that are lock-tight and have been tested with factual supporting evidence, only to have them tested elsewhere with pressure fans days later. The pressure simply blows holes through the fresh sealant.
The result is a very visual show. The customer sees bubbles, the repairer reports a leak, and the owner ends up paying for repairs that were not actually needed until the test itself caused the damage.
Caravan Water Damage Repairs
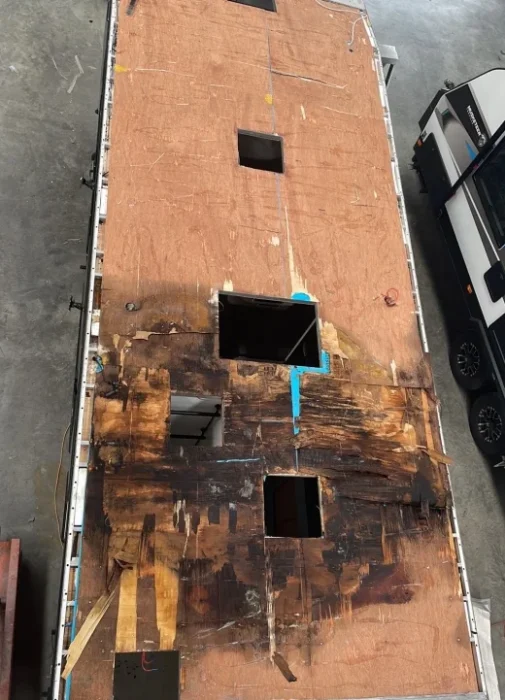
Caravans may use aluminium or timber framing, metal cladding, fibreglass mouldings, composite wall panels and bonded flooring. Water can affect each of these materials differently.
A leak around a window may damage the wall lining, framing and cabinetry below it. A failed roof join can allow water to travel through insulation before appearing on the opposite side of the caravan. Moisture beneath a floor covering may weaken the internal core long before the surface feels noticeably soft.
Common signs of caravan water ingress include:
- staining around windows, vents or roof joins
- bubbling or swelling wall panels
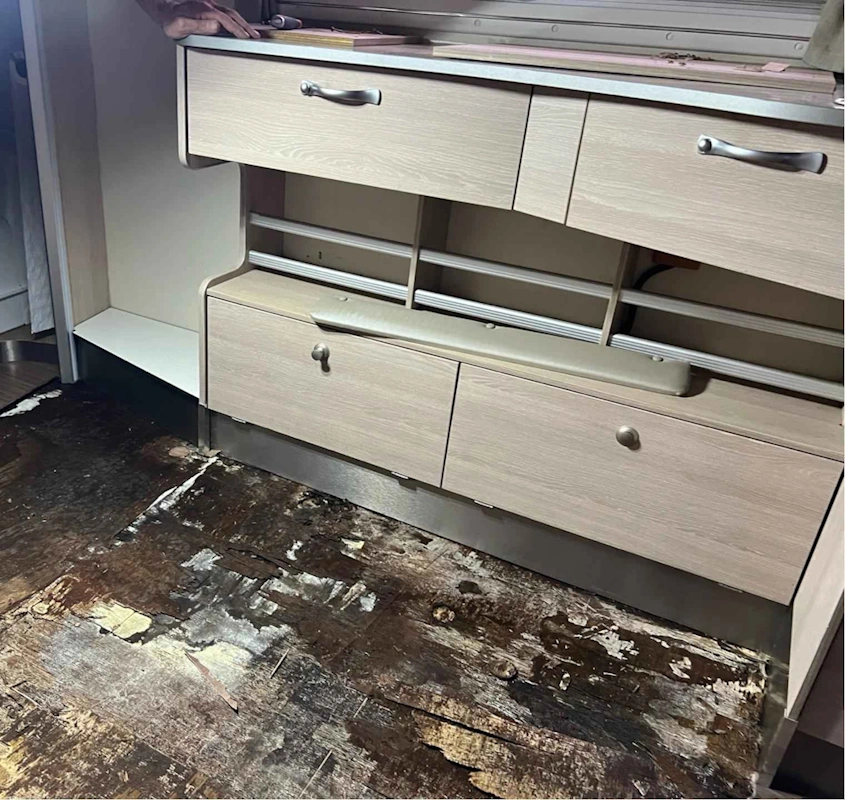
- soft or spongy flooring
- lifted or discoloured vinyl
- damp cabinetry
- mould or musty odours
- rust or corrosion around fittings
peeling internal finishes - water marks that return after rain
- movement around body joins or windows
The repair depends on the entry point, materials affected and how long moisture has been present.
Some jobs may require resealing and a localised interior repair. More extensive damage can involve removing cladding, windows, cabinetry, wall panels or flooring so wet and deteriorated materials can be replaced.
Where the leak is related to accident or storm damage, the work may form part of an insurance repair. Where the cause appears to be a manufacturing or component fault, the owner may be able to approach the dealer or manufacturer if the applicable warranty remains in effect.
Motorhome & Campervan Water Damage Repairs
Motorhomes and campervans combine a driveable body with a fitted living area, creating more joins, mounted components and potential water-entry points.
Water may enter around the roof, Luton peak, windows, vents, air conditioners, awnings, solar equipment or slide-out seals. It may also originate from showers, plumbing systems, appliances and water tanks inside the vehicle.
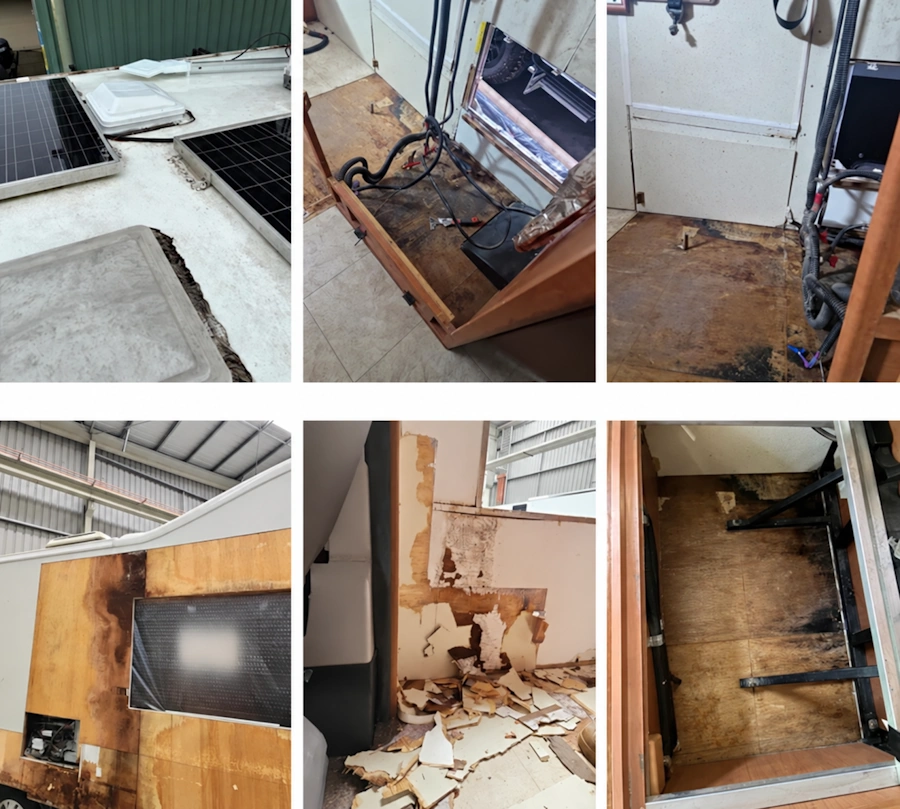
In a motorhome, moisture can spread into upper cabinetry, wall structures, floor panels, slide-out bases and underbody materials. The damage may also sit close to wiring, appliances or mechanical components that require separate inspection.
Campervans can experience similar problems around pop-top roofs, side windows, conversion joins and compact bathroom areas. Because the interior is smaller, one plumbing leak can affect several adjoining fittings and panels.
A complete assessment may need to consider:
- roof and body seals, window and door frames
- Luton peaks and fibreglass mouldings
- air-conditioner and vent penetrations
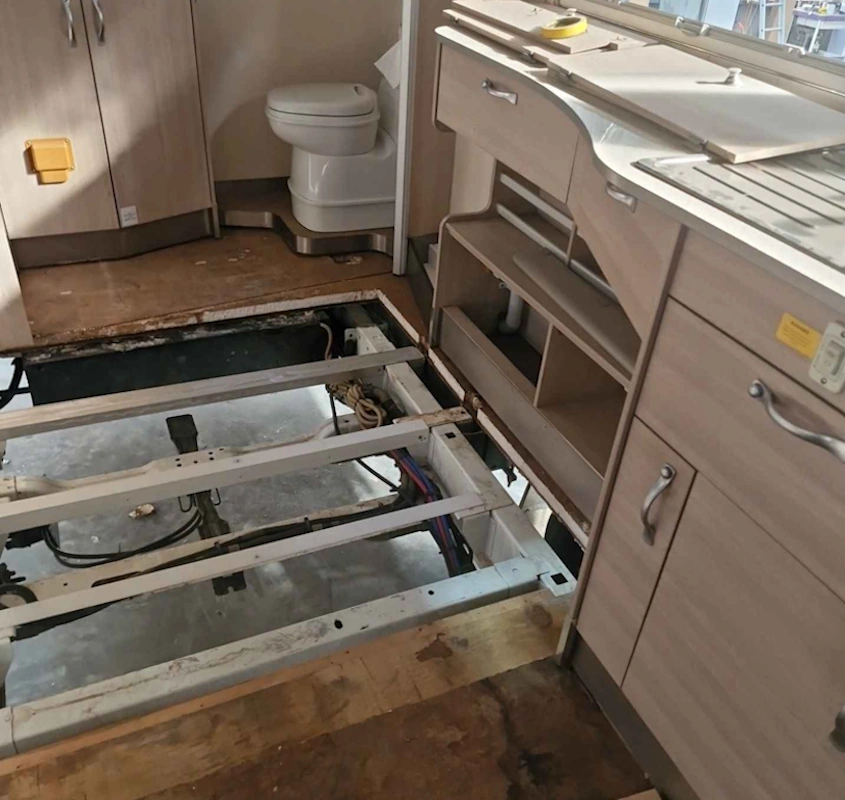
- composite floors and underbody sheeting
- interior plumbing, shower trays and waste fittings
- cabinetry and internal linings
- electrical systems near the affected area
- slide-out seals and alignment
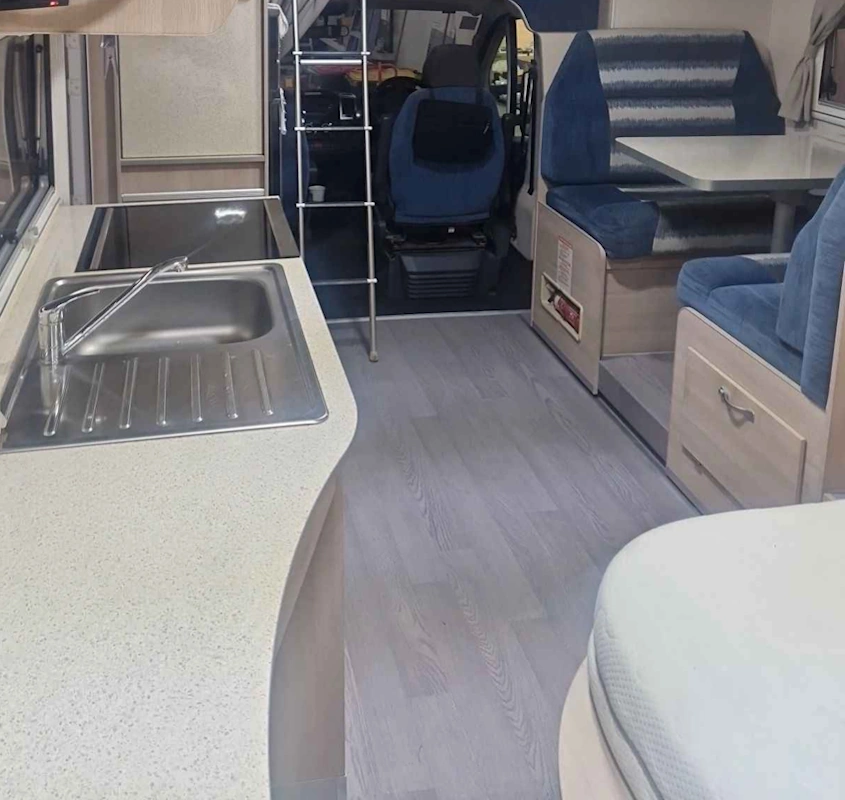
For large motorhome floor repairs, slide-outs may need to be removed before the full extent of the damage can be accessed. These repairs can involve replacing the floor panels, internal foam or framing, underbody aluminium, vinyl and affected slide-out components before the system is refitted and calibrated.
How the Water Ingress Repair Process Works

Initial Leak Detection & Assessment
We begin with a leak detection assessment to identify any areas of concern.
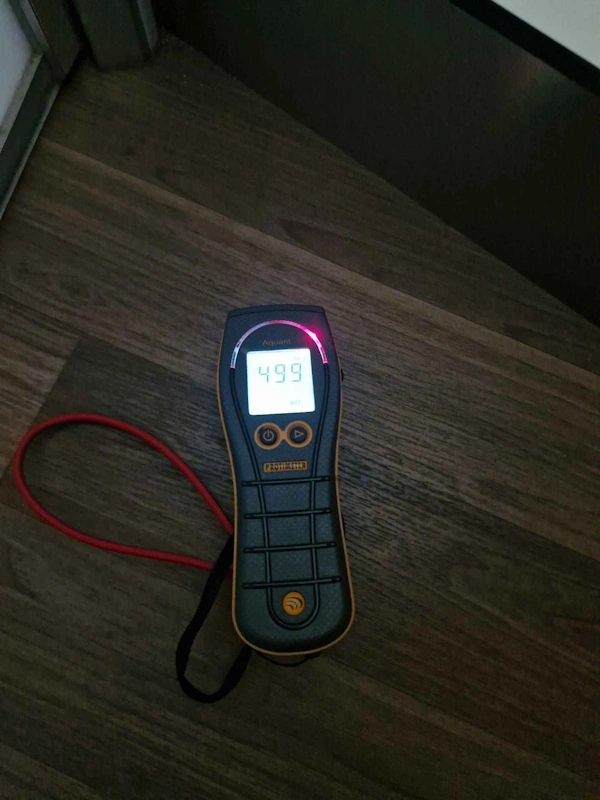
Testing includes thermal scanning, moisture readings and inspection of relevant areas, with scan images and readings recorded as part of the assessment.
Where required for an insurance or warranty repair, the findings can be documented and provided with the repair assessment.

Water Testing & Identifying the Source
Where further testing is required, targeted water testing is completed to help confirm the source and location of water entry.
The results are compared with the initial thermal scans, moisture readings and areas of concern to determine the likely entry point and extent of affected areas.
This information helps establish the appropriate repair method and scope of works.

Leak & Water Damage Repairs
Once the source and affected areas have been identified, repairs are completed to address both the water entry point and any resulting damage.
Depending on the findings, repairs may include resealing, fibreglass or composite repairs, roof or component repairs, internal wall or ceiling repairs, flooring repairs and replacement of water-damaged materials.

Post-Repair Testing & Verification
Following repairs and the required curing period, the RV undergoes a 20-minute water test, together with follow-up thermal scans and moisture readings of the applicable areas.
The post-repair results are compared against the original assessment to confirm the areas of concern have been addressed.
Supporting test images, readings, and the completed post-repair report provide a documented record of the final inspection.

















Trusted Water Damage Repairers
RnR Refinish combines non-invasive moisture scanning with hands-on experience in fibreglass, composite panels, cladding, flooring, cabinetry, plumbing and RV body construction.
Our Clontarf facility allows investigations and repairs to be completed in a controlled environment. Where further dismantling is needed, the vehicle can remain within one repair operation rather than being moved between unrelated service providers.
The repair is planned around evidence from the affected area. This helps reduce unnecessary dismantling while making it less likely that hidden moisture or the original entry point will be overlooked.
We can also provide supporting documentation where the work is being considered under insurance or a manufacturer warranty.
